

“Cleats” are Used to Mount Corrugated HDPE Plastic Pipe on the Outlet of a Water Level Control Structure
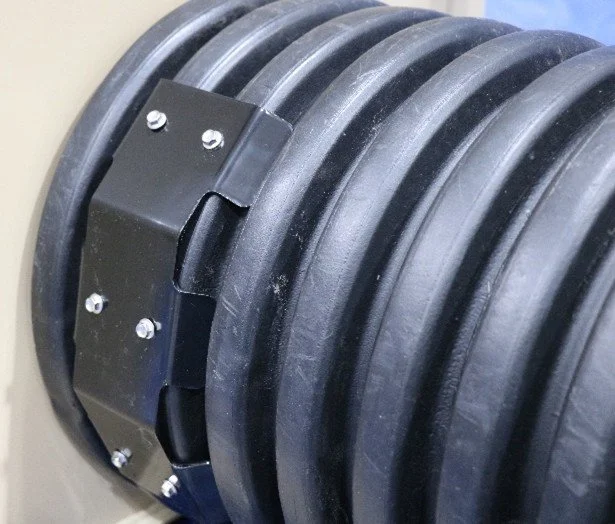

“Cleats” are metal clips that grab the corrugated pipe and hold it in place with self-drilling screws.
The metal nipple on the back of the riser box is formed to slip inside of the provide designated pipe diameter.
Slide the pipe over the nipple and position the supplied cleat on the side as shown. Using a powered screwdriver or drill with a 5/16 or 3/8 socket (depending on the screw size), drive the supplied self-drilling screws through the pipe and into the nipple as shown in the video. We recommend starting with the center two screws then the outer screws. Repeat on the opposite side using the second cleat.
These cleats provide a robust connection that will not easily rip out or tear the pipe. The cleats can optionally be mounted by bolts extended from the inside of the nipple if you prefer not to have the points of the self-drilling screws extending into the pipe. Simple drill holes and place bolts from the inside and fasten the cleats with nuts.
The bell-end of the pipe will be very loose on the nipple. Simply cut the bell off just before the first rib for a nice fit.